Are you interested in creating an online course website?
But don’t know where to start, we’ve got your back.
Say goodbye to a traditional way of creating a website from scratch and say hello to makeyourwp.
With makeyourwp you can create an online course website quickly even if you don’t know how to build them.
Yes, I repeat even if you don’t have any idea about website development or designing. You can create your own website with mywp’s pre designed website templates in a few seconds.
And most importantly you don’t need to concentrate separately on things like domain, hosting, wordpress installation, theme selections and plugin options.
MYWP comes with built-in hosting included with a custom domain option, easy customization with wordpress, inbuilt themes, plugins & features you need, and free maintenance.
Interesting right? It’s absolutely a time saviour.
Now, without further ado, let’s get started!
Here are the steps you need to follow to create an online course website with makeyourwp.
Step :1 Pick a plan that’s right for you.
In order to create an online course website in MakeYourwp, the first step is to select the right plan for you.
Plans and pricings can vary depending on your website requirements.
To check out the plans click here.
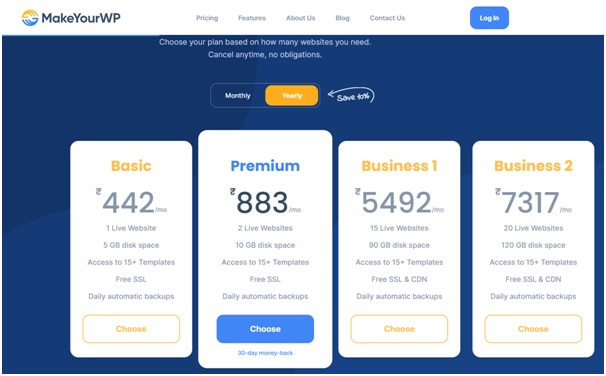
Now you will land here.
Check out our various plans and its benefits and choose yours according to your website needs.
Once you’re done with the purchase,
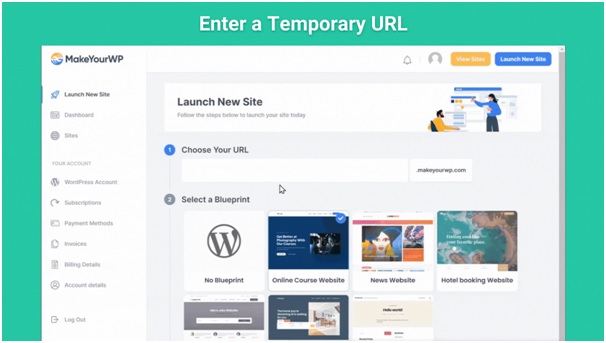
Enter a temporary URL you want for your site
Consider this as a temporary domain. We will discuss how to get your own unique domain in the upcoming steps.
The next step is to select the online course website template and launch it.
Once your site has been launched. You now need to add your courses to your website.
Step : 2 Update your course to your site
For updating your course content on your site you need to login in to your site.
In order to do this, go to the makeyourwp account and click on admin.
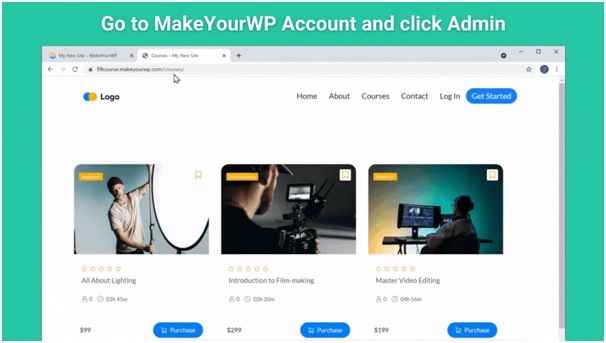
Once you log in here,
You can now access the WordPress dashboard, where you are able to control your website completely.
Now before adding your courses to your site just remove your sample courses that come with a template and start adding yours to the site.
To add your course Go to courses >> Click add new
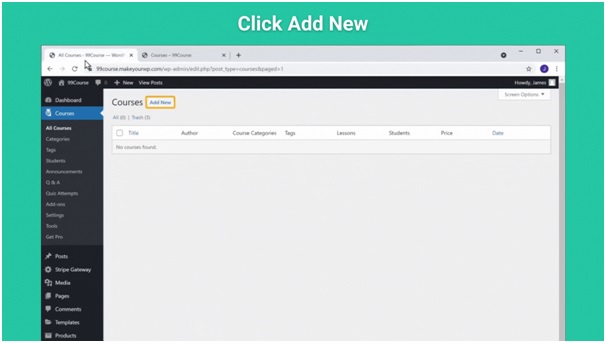
Then, provide the necessary information about your course like its name, description, and appropriate image for your course.

Once you’ve done with everything click publish.
That’s it.
We’ve successfully updated the basic details about our course on our site.
Now it’s time to add topics, lessons and content.
To add a topic
On your course page, scroll down and click Add a NewTopic.
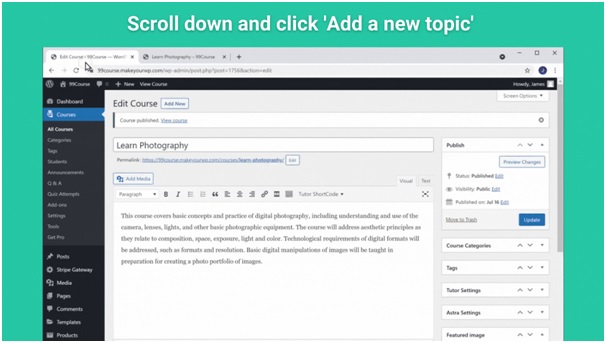
One by one, add the topic names you want to include in your course.
And click add topic to update them.
After updating the topics now you need to add lessons for each topic.
To do so,
Just click on Lesson and enter the title for your lesson.
And then click ‘update lesson’.
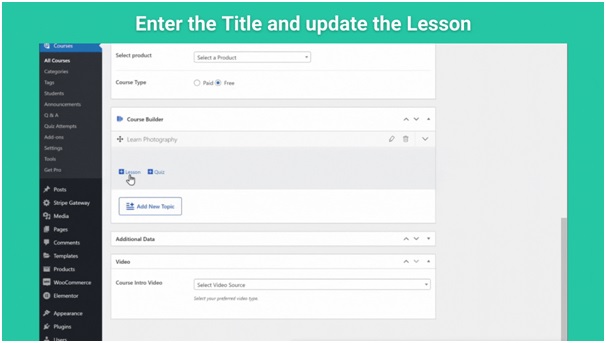
In the same way, you can add all of your lessons for each topic.
Once you have made your changes, click the update button.
And finally in order to complete the course, we must add content to each of these lessons.
For adding your lesson content go to the course page and select the lesson you want to add your content.
Then start adding your content either in text or video format.
We all know that video courses are more engaging than textual content.
The first step in adding a video is to select its source. If you click ‘select video source,’ you’ll see a list of different types of video sources that you can choose from.
Our recommendation for creating video courses is Vimeo, which blocks people from downloading your course videos.
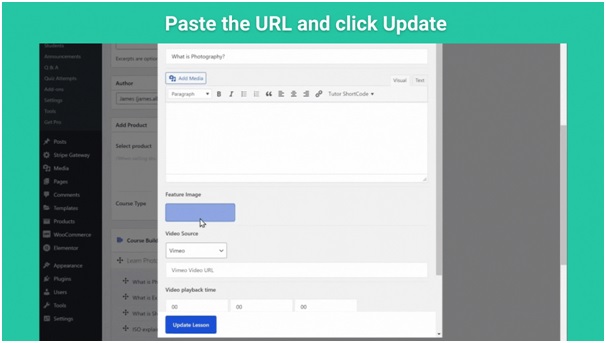
So you need to enter your vimeo video URL in order to add any video.
In order to get a Vimeo video URL, you must upload your video to vimeo by creating an account there and get that link to paste here.
After getting the vimeo video URL link you can go back to your course edit page, add the URL, and click on ‘Update.’
Once you’re done, go back to your course page and click refresh then you’ll see that your video has been added to the course.
You can add videos to all lessons the same way. And that’s it about adding content to your course.
Likewise you can also edit a page on your site if necessary.
To do so, Just go to any page that you want to edit
Click ‘Edit’ with elementor.

Now you can customize all the elements as per your liking. From text to image you can replace/edit everything here.
Now the next step is making your course a paid one!
Step : 3 Set it up as a paid course
In order to make your course a paid one, you must link it as a product and add a payment method.
With the help of plugins we can easily finish setting up these steps.
Plugins help in adding new functionality or extend existing functionality on your site.
As I already told Makeyourwp comes with pre installed plugins which you need for your website, so you don’t have to worry about those things.
We use the WooCommerce plugin for selling, and the Tutor LMS plugin for making online courses.
Now let’s get started on creating a product for the course
To create a product go back to your wordpress dashboard then go to Products and click ‘add new.’

Now give the name for the product. Enter the same course name that you have created earlier and enable the option ‘For Tutor.’
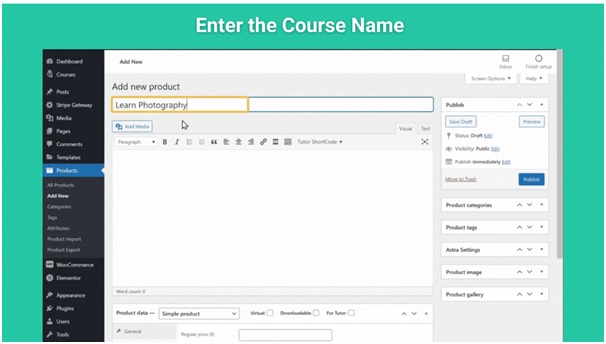
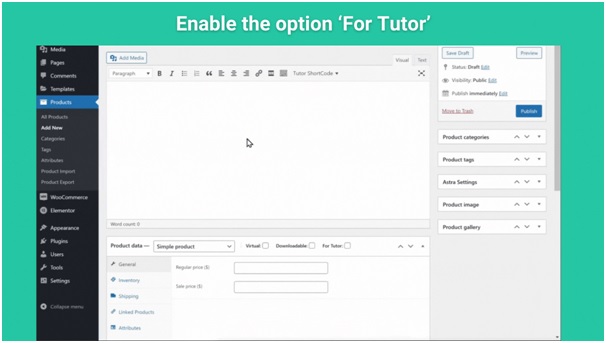
Now you need to set a price for your course in the ‘Regular price’ section.
And click ‘Publish’ to create the product.
Next, let’s link your product to your course once you have created your product.
So to link the product with the course,
Go to Courses and click on ‘All Courses.’
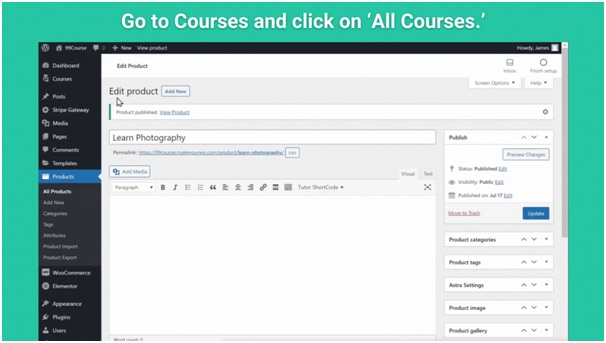
Now open the course which you have already created
And scroll down
Select a product which you have created now and set course type as paid.
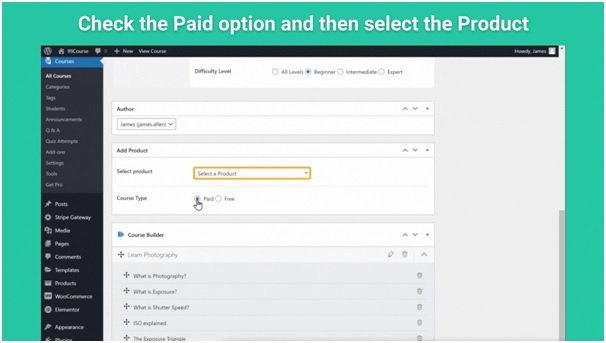
You have now created your product and linked it to your course.
Once this is done, just click update.
You’ll notice that your product is now available for purchase if you click refresh on your course page.
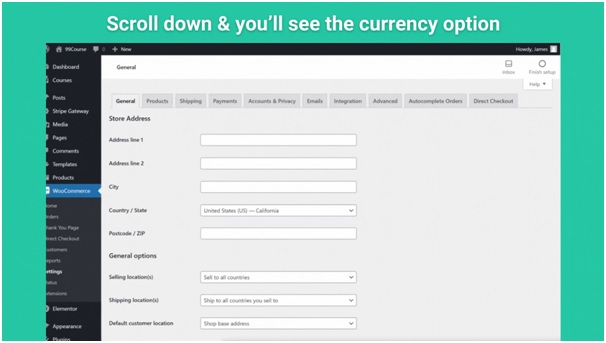
You can also change the currency type if necessary.
To do so go to WooCommerce Settings > Currency options
Here you can change your preferable currency type.
After successfully creating a product and linking it to the course. You now need to add a payment method to let your customers pay for the course.
And finally you need to add a payment method to let your customers make payments on our site for purchasing the course.
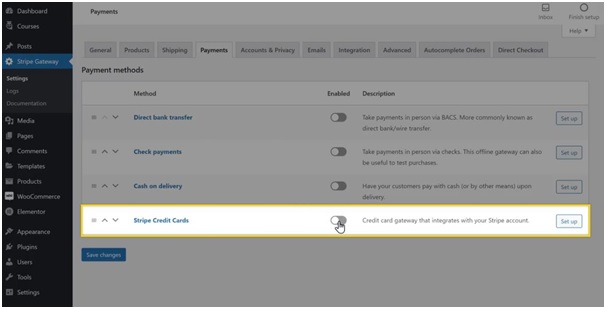
To set up a payment method go to your wordpress dashboard
Click on WooCommerce, and click payments.
In this section you’ll find a list of different payment methods that you can add to your site. We are going to use the Stripe payment method in this article.So we are enabling the Stripe option now.
Now click on ‘set up’ next to stripe to set up the payment method.
It will direct you to this page
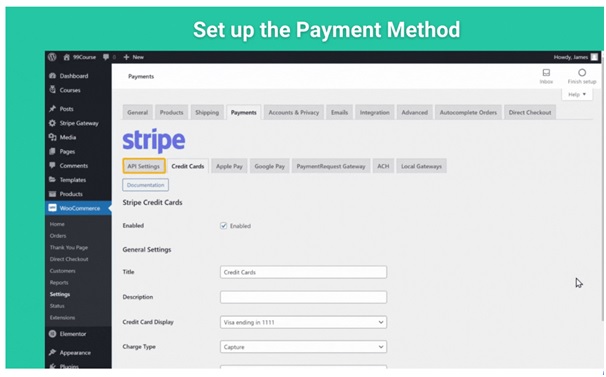
Here click API settings, then ‘click to connect’
It’ll take you to the stripe website.
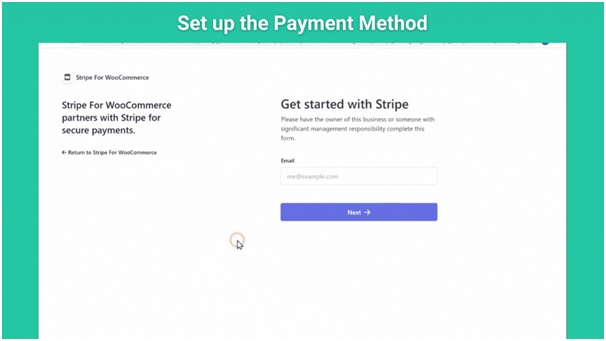
Here you need to create an account on stripe to setup payment option.
Give your business details and your bank details where you want to receive your payments one by one to create an account on stripe.
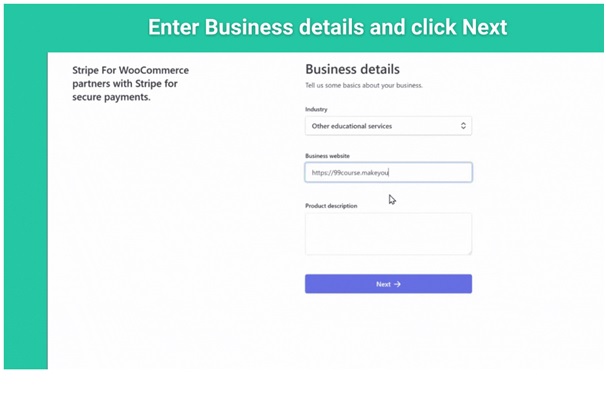
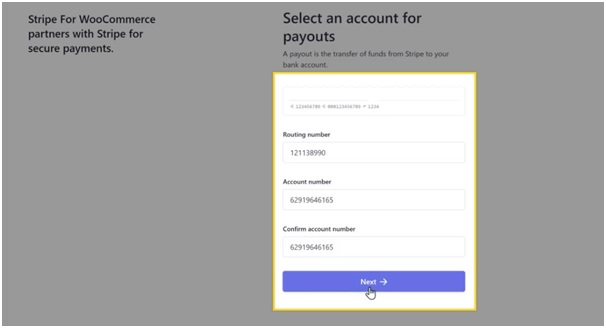
In the future, when someone purchases your course, that money will be transferred to this account.
Now click next after entering the bank details.
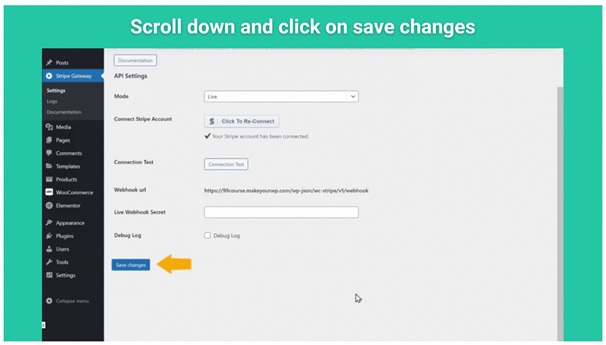
It will direct you to the wordpress dashboard. Scroll down and click ‘save changes’
So, now we have successfully added the stripe payment method to our site.
The option to pay for the course can now be seen if we click refresh on the course page.
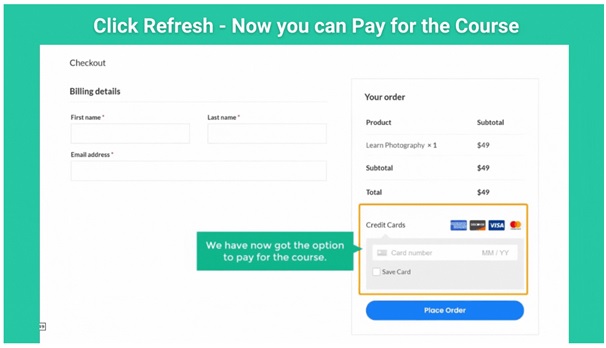
And that’s it.
You will be able to accept payments from your customers now.
You will get an email from your website and stripe every time someone purchases your course.
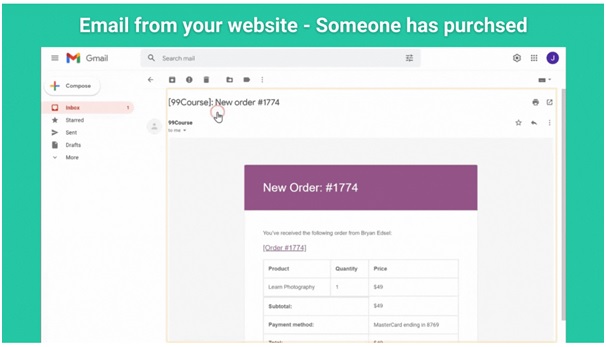
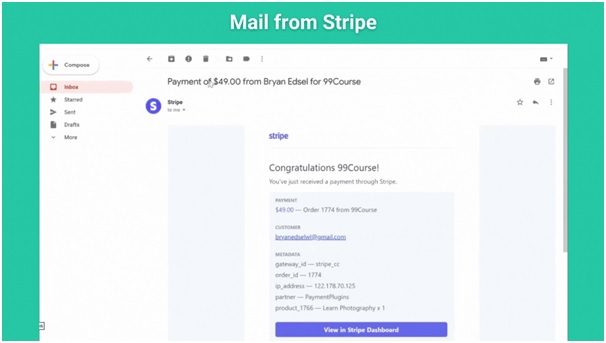
Here’s how your course can be purchased by your visitors.
Okay. As of now, our site and course are ready, but the domain is still not set up.
We’ll now see how to get your own domain.
Step : 4 Get your custom domain name
You can get your domain in one of the best hosting provider webspacekit. It is the affordable hosting provider with so many features and it also offers free domain, free SSL, free business email, and 45% discount on web hosting. Basically you can get started for 199INR per month.
Click this link to get your domain name from Webspacekit.com and it will take you to WebSpaceKit.
Enter the domain name you need for your website here. And check for its availability.
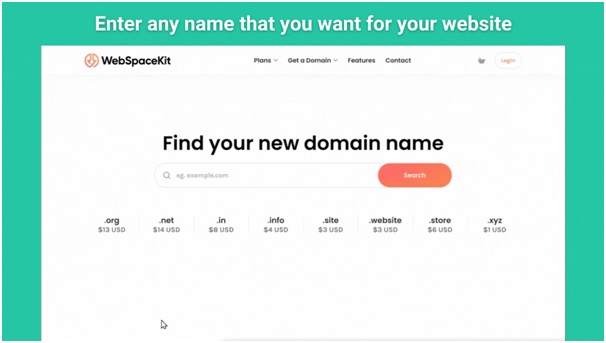
Purchase it if it’s available.
The next step is to connect your domain to your website once you’ve got your domain.
Now let’s see how you can connect this domain with your online course website that we just created.
In two simple steps, we can connect this,
- Add your dominion to your site.
- Add IP address to your Domain.
Add your domain to your site
To add a domain to makeyourwp
Go to the makeyourwp dashboard and go to ‘domains’

Now enter the domain you have purchased on WebSpaceKit here.

After entering your domain, let’s move on to the final step of adding this IP address to your domain.

Add IP address to your domain
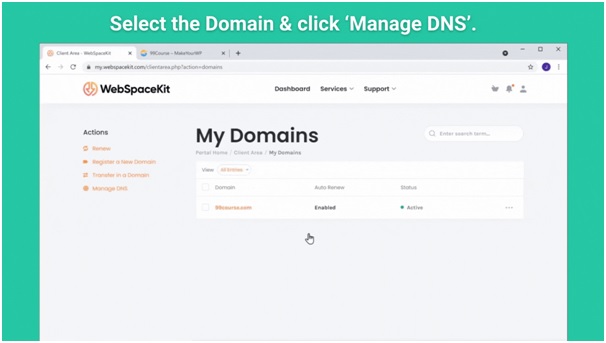
Go to your WebSpaceKit account and click domains to add the IP Address.

Now select the purchased domain and then click ‘manage DNS’.
To edit your IP address, click the editing icon.
![]()
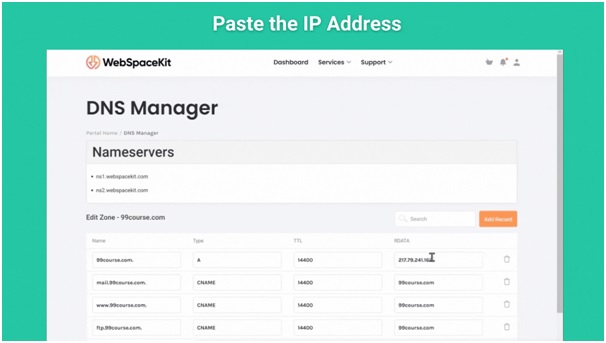
Now you will need to add your IP address to the ‘A’ record from MakeYourWp.
To do this you will need to copy the IP address from your makeyourwp tab first.
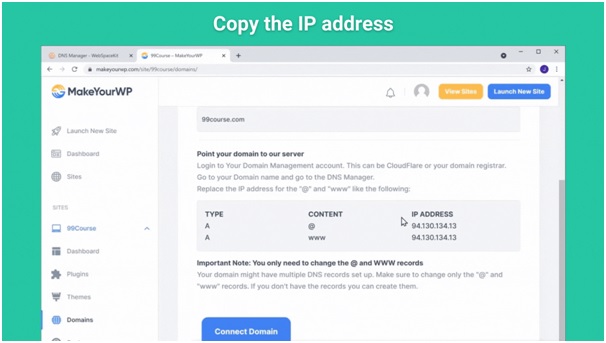
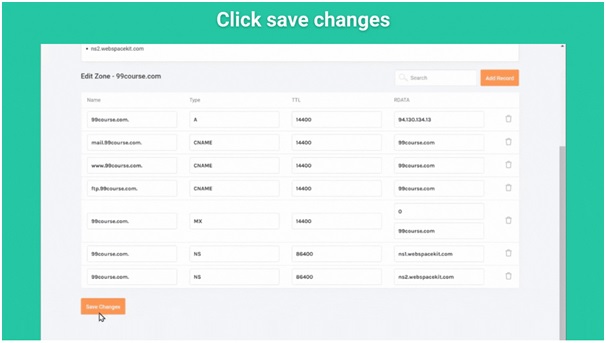
You can then paste the IP address next to the ‘A’ records on your domain.
And then click ‘Save Changes’
Now click on connect domain on makeyourwp.
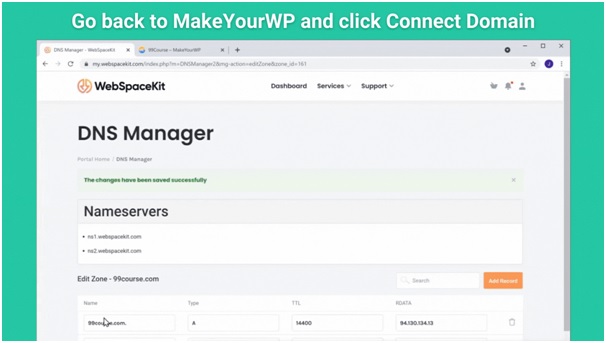
Our domain is now successfully connected.
And That’s it.
You now have a fully functional online course website with you.
Our part is over now and it’s your turn to get out there and share your knowledge with the world with your wordpress online course website.


